Make the Most of the Spring Growing Season
~ April ~
Grow a No-Till Garden
Start your garden as soon as you can work the soil, certainly in April if not already in March.
Do not spade. Save your back and your soil by planting no-till.
Think about it: Spading primarily buries weeds. Unless you’re incorporating lots of compost into the soil, you gain nothing, other than exercise, from spading your soil. To conserve soil moisture and energy, simply hoe out the weeds or kill them with horticultural vinegar about a week before you intend to plant.
Immediately after planting, mulch the garden with LeafGro or compost.
Your no-till gardening conserves moisture and the soil’s organic matter. Every time you spade or rototill the soil, you hasten the decomposition of organic matter, causing your soil to become denser. It is easier for the roots of plants to penetrate soils rich in organic matter than to penetrate soils devoid of organic matter.
The roots of transplants will follow those worm holes deep into the soil as well as filling the voids left behind by the decayed roots of last year’s plants.
Start with Cold-Loving Veggies
Plant young transplants of broccoli, cabbage, cauliflower, Chinese cabbage, collards, kale, kohlrabi and Swiss chard as soon as you can work the soil. If you didn’t grow your own plants from seed in late winter, you can buy plants at nurseries and seed and feed stores.
It’s also time to plant onions from sets or your own seeds.
Sow peas, lettuce and radishes directly into the garden. These salad favorites grow best in cool weather; most are immune to late frost damage. Heat released from the ground during frosty nights provides adequate protection.
Because soils are still cold, use a starter fertilizer at transplanting time. Your soil may be rich in organic matter, but those nutrients are not readily available; microorganisms need warmer soils to release the nutrients.
The ground is too cool now for common granular fertilizers such as 10-10-10. The nutrients in starter fertilizers, however, are readily absorbed by roots.

Prune Hydrangeas
In Chesapeake Country, we can grow four species of hydrangeas. Each has its own pruning needs.
The most common, house hydrangea (Hydrangea macrophylla), produces red, pink or blue flowers. Prune your house hydrangeas in early April by first removing canes that produced flowers last year. Cut them as close to the ground as possible. Then prune out all stems smaller than a pencil in diameter, again cutting close to the ground. These thin weak stems will generally not produce flowers.
Next, cut back each remaining stem down to a strong vegetative bud. These buds will produce strong stems and large flowers.
If you have a house hydrangea that never or seldom flowers, it most likely is a greenhouse forcing cultivar that is not cold-hardy. Get rid of it.
Peegee hydrangea is generally a small tree three to six feet tall that produces large white clusters of flowers. Prune this species no later than April around the main trunk. In time, it will develop a large head of branches.
Hills of Snow hydrangea (Hydrangea arborescens Grandiflora) produces great mounds of white flowers growing on stems from a crown. Electric hedge clippers are the best tool to prune this species. Cut the stems as close to the crown as possible before the new growth starts in the spring.
After the new growth has started, selectively hand prune the smallest and weakest buds and try to space the remaining buds three to four inches apart. This will result in the plants producing the largest and fullest flower heads. In late fall, the flower heads are great for making dried floral arrangements.
Oak-leaved hydrangea (Hydrangea quercifolia) is the easiest to care for. You simply leave it alone unless an unwanted, bothersome branch develops. Choose oak-leaved hydrangea in blue, white and light pink or the cultivar Snow Queen, which produces large white cone-shaped flowers and attractive scarlet-colored foliage in the fall.
Prune Crape Myrtle
For plentiful flowers and attractive stems, crape myrtle demands good pruning. April is the time.
This year’s flowers will be produced only on new stems shooting off existing branches. The largest clusters of flowers will grow on the most vigorous stems. If you don’t prune severely now, your crape myrtle will produce an abundance of small clusters of small flowers with many of the clusters hidden from view.
Proper pruning begins at the base. You do not want too many stems. For handsome limbs and big flower clusters, select three, five or seven well-spaced vigorous stems. Use ribbons or tape to mark them not for pruning.
Using a pruning saw, remove all other stems as close to the ground as possible. Avoid leaving stumps because they will produce an abundance of sprouts that will require frequent removal all summer long.
Also remove all branches and stems that cross and rub on the desired stems and branches.
Next, remove all side branches from each stem up to a height of four to five feet.
Now that you have thinned the base, you are ready to do some serious top pruning.
Before the sap flows, you can wipe away all small twiggy stems with your hands; wear leather gloves. Use pruners to cut out crossing branches and low-angled branches that interfere with mowing the lawn or gardening.
Finally, cut back all stems that produced flowers last year and prune out all stems smaller than a pencil in diameter.
Normally, a single pruning each year keeps crape myrtle healthy. If yours does not produce strong, healthy stems and large flowers after having been pruned as described, it may need to be fertilized.

Prune Forsythia
Mid-April, when the last petals of forsythia have fallen, is time to prune.
Forsythia’s beauty is spoiled when plants are either sheared or let go. Such plants produce fewer and fewer flowers each year and eventually die out. A properly pruned forsythia should look like a yellow fountain of flowers born on slender brownish-yellow stems.
Proper pruning requires that you get down on your knees to remove all old branches that have gray bark. If you have not pruned your forsythia properly, this could mean cutting all of the branches as close to the ground as possible. If you prune now, new vigorous stems will emerge from the roots within a few weeks. Allow these stems to grow without further pruning all summer long. If the plants are in good condition, the new stems will grow to a height of five to six feet by mid July, and their bark will be brownish-yellow.
If your forsythia are relatively young, you need remove only the old gray-barked stems near the ground and allow only the lighter brownish-yellow colored stems to remain. Prune all stems smaller than a pencil-width in diameter, and remove all stems bending sharply toward the ground. You do not want these stems to touch the ground because they will take root and produce new plants, which can result in overcrowding.
When you are finished pruning, all that should remain are upright single stems with brownish-yellow bark.
By properly pruning your forsythia now, you will be guaranteeing a fountain of flowers next spring.
Lime Your Lawn
Lawn grasses grow best on soils that are only moderately acid. Many Bay soils are very acid.
Applying limestone now to neutralize your soil, bringing it closer to the ideal soil pH for growing lawns, between 6.0 and 6.5. In this pH range, all of the nutrients essential for good plant growth are available to the roots of the grasses. In turn, fertilizers you may apply in fall — the best time to fertilize bluegrass and fescue lawns — will be effectively utilized.

Soil testing is the only sure way of determining the amount and kind of limestone to apply. If you don’t want to take the time to have your soil tested, then apply between 50 and 80 pounds of dolomitic limestone per 1,000 square feet. Do not use hydrated or high-calcium limestone, as most of our soils are deficient in magnesium, and dolomitic limestone contains magnesium.
If you want your lawn to be dark green and dense, late April to early May is the time to apply limestone. Wait till fall to fertilize.
~ May ~

Plant Heat-Loving Summer Veggies
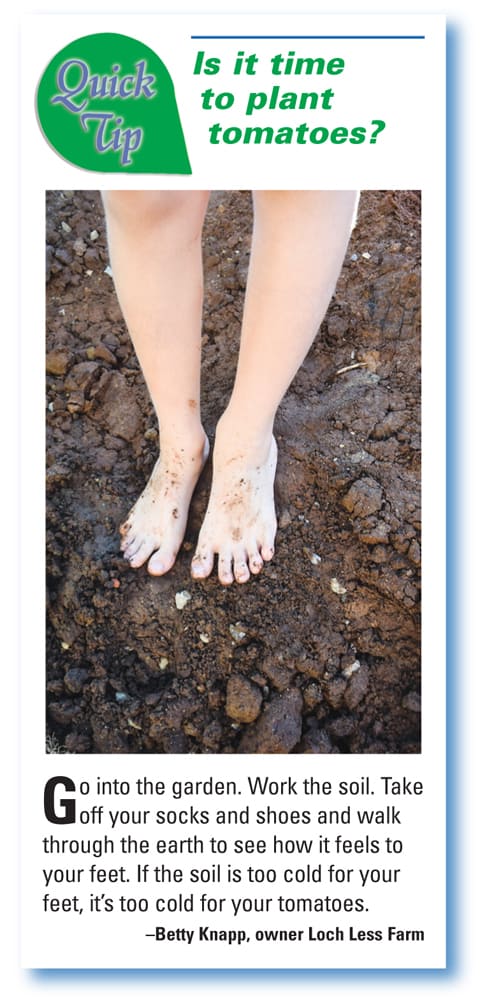
Plant warm-season crops — annual flowers, tomato, pepper, eggplant, okra, corn, beans, squash, cucumbers and melons — as transplants. Don’t get ahead of yourself. You must wait until soil temperature in the upper four inches is 60 degrees or higher. That’s late May or early June, when natural nutrients from organic sources will be available.
Choose a spot that gets full sun and dig a hole some three feet in diameter and 18 inches deep. Mix the soil thoroughly with one-third by volume of compost, one cup of dolomitic limestone and one cup of gypsum. Dig the mixture back into the hole and plant your tomato or pepper plants in the middle.
Plant tomatoes and all your annuals at the same depth of their existing root balls. When you plant too deep, you suffocate the original root system so that the plant must develop new roots along its stem to survive. Planting too shallow exposes half the roots to excessive drying.
If you purchased plants in peat pots, tear away the top edge of each pot before planting. If the peat pot protrudes above ground, the exposed edge will wick water out of the soil and from around the root ball.
If the roots are not growing out through the walls of the peat pot, tear away the entire pot. If peat pots dry out before the roots penetrate the walls, the walls harden, becoming impervious to water and roots.
If you purchased plants growing in cell packs or in pots, tear away some of the outer roots on each root ball before planting them.
Give them room to grow. Tomatoes, peppers and eggplants need light for photosynthesis and air circulation around their leaves, stems and fruit to minimize disease. When plants are crowded, they compete for light, water and nutrients.
A tomato plant that has been allowed nine square feet of space will produce many more tomatoes than plants given only four square feet of growing space.
After tomato and pepper plants start growing, spread about two heaping tablespoons of 10-10-10 fertilizer or six heaping tablespoons of bone meal in a 12-inch circle around the base of each plant and cultivate into the soil.
Prune Azaleas, Rhododendrons and Mountain Laurel
Wait for new growth to appear after flowering, in late-May to mid-June, to prune.
Cut back all growth down to stems about an inch in diameter. These stems are not only loaded with latent buds but also capable of generating adventitious buds so sprouts will generate up and down remaining stems within three to four weeks.
Delay fertilizing until the second year of growth to give the root system time to adjust to a lesser amount of top growth.
(Late winter option: If you can tolerate not having flowers for a year, the earlier you prune back, the earlier the plant will generate new growth. They can be cut down as far as the ground in the spring and come back like gangbusters in July)
How low should you cut them? Twelve to 12 to 18 inches below the height you desire to allow space for training the new growth.)

Mulch Sparingly; Compost Is a Better Choice
You could be killing your plants with mulch. Sure, a fresh layer of much makes your plantings look better. But piling it on, like mounding it around shrubs and trees, is deadly.
If you insist on purchasing mulch, choose pure pine, spruce or fir bark mulches. These mulches contain 90 to 100 percent lignins, a source of carbon not easily digested by microorganisms. Thus, they do not decompose readily and last on the surface of the ground one to two growing seasons. These mulches also contain polyflavanoids, which are beneficial because they help make essential trace elements available to the roots.
Pine bark is available as nuggets, ground or as pine fines. The nuggets and ground mulches are the best. Pine fines are generally only recommended as a soil amendment to increase the organic matter and help in lowering the pH of soils as all pine mulches are acidic.
Pine needles can be used as mulch but have a limited useful life. Use hardwood bark mulches with caution.
Unlike pine mulches, hardwood bark mulches contain up to 60 percent cellulose, which means they will decompose and rob nutrients from plants. They will also raise the pH of soils, making them less acidic. Manganese can also accumulate from repeated applications of hardwood bark, making the roots of the plants unable to absorb iron, and plant growth declines.
Never use colored mulches near annuals, shallow-rooted trees and shrubs or herbaceous perennials. These mulches are made using raw wood that serves as a source of food for microorganisms once it comes in contact with the ground. Microorganisms are better able to absorb nutrients in wood than the roots of plants. As a result of the competition, plants — including weeds — starve and die.
Use colored mulches only around well-established deep-rooted trees and shrubs, for making pathways, sitting areas and playgrounds.
Mother Nature provides us with an abundance of mulch every fall. Fallen leaves and pine needles are excellent mulches. When they decompose, nutrients are released into the soil, thus feeding the roots of mulched plants.
Cut Your Grass Tall and Let It Fall
Mow your lawn to health and easy maintainence.
Set your blade height to three-and-a-half to four inches. Mow weekly, and allow the cut grass to lie where it falls.
Grass blades cut three-and-a-half to four inches tall give you two advantages. First, the soil’s surface remains constantly shaded and cool, promoting rapid decomposition. Such fast decomposing returns nitrogen and other nutrients into the ground, improving the soil.
Second, these longer grass blades can photosynthesize more, growing deeper roots that are better able to absorb more water and nutrients. Stronger grass plants deter weeds such as dandelions, crabgrass, goosegrass and chickweed. These weeds cannot spread outward with taller grass.
Letting clippings settle through the blades also makes sense. Grass clippings contain three to four percent nitrogen and, being succulent, are easily decomposed in shaded ground.
By cutting your lawn tall and letting it fall, you’ll reduce your fertilizer bill, use less gasoline in your lawnmower and save the grass’s energy by cutting blades and not stems. A tall lawn will also keep your mower blade sharper longer and keep you — or a bystander — safer from flying objects dislodged by the spinning mower blade.
~ June ~
Water Your Garden the Right Way
Daily watering is bad for your garden. Keeping the soil constantly wet limits root growth. Light daily irrigations cause roots to grow shallow, making them more susceptible to drought damage due to limited root distribution.
Alternate wetting and drying of the soil is what stimulates roots to grow. A single heavy application of water weekly is all that is needed to successfully grow a garden.
If your garden does not receive an inch of rain each week, irrigate. To get the equivalent of one-acre-inch of water, water with a lawn sprinkler until it fills a tuna can (set one out to measure).
The worst method for irrigating a garden is with a garden hose and hand-held nozzle — unless you are planning on drinking a few beers while sitting in a very relaxing chair.
Never spray heavy drops of water directly on the soil. The impact destroys soil structure. A breaker commonly known as a showerhead is the ideal tool for watering the garden by hand. It allows for a volume of water to be applied as mild raindrops. Minimize the damage of large water droplets (and reduce the loss of water by evaporation) by laying a half-inch of compost over the soil.
Proper watering also helps avoid such leaf diseases as powdery mildew, frog eye and black spot on roses.
Most leaf diseases are caused by the foliage remaining wet for 14 hours or more. To avoid the spread of disease on the leaves of plants, don’t water in the early morning. Wait until an hour after foliage has dried from the dew. To make certain that the foliage is completely dry by evening, water before 4pm.
Or wait until the sun goes down. Night is the best time to water. The loss of water by evaporation is minimized, so more water goes into the soil. Since foliage will already become wet with dew, water applied at night will dry at the same rate that the dew dries in the morning.
Control Weeds by Hoeing or Mulching
The better you control weeds in the garden this year, the fewer weeds you will have next year.
Weeds have the capacity of generating thousands of seeds, which means that many seeds scattered on the ground this year will be germinating next year. Not all of the seeds will germinate; many hard seeds can remain in the ground for years, especially if they get buried.
Control weeds best by frequent hoeing to get them when they’re small.
When hoeing, disturb as little soil as possible. The more soil you disturb, the more weed seeds you are likely to stimulate into germination. Most of the weeds you’ll encounter are summer annuals that require being exposed to sunlight to germinate. With ample moisture in the soil, many need only a second or so of light to initiate germination. Many large commercial farms now sow and cultivate their crops at night to minimize weed problems.
I use a hand-push single-wheel cultivator with a sharp flat Nebraska blade that slices the weeds at the soil line. This tool causes little disturbance of the soil, and it can be used with minimum effort. The Weed Bandit hoe is also a good tool for controlling weeds.
Whatever your tool, it must be sharp. For good weed control when seedlings are young, all that is necessary is to cut the top of the seedling from its roots. The roots are not capable of regenerating at this stage of development. You can do all you need by simply scratching the surface of the soil. Controlling weeds that are several inches tall requires more effort and more digging.
Mulch can also control weeds.
Straw — not hay — can be used as mulch, but seeds from its plant will sprout as weeds. Even newspapers can be used, applied in 10 to 15 layers and soaked with water immediately to stop them being blown away. I use shredded paper because it is easier to spread and, once soaked with water, remains in place better than sheets of newspaper.
Shredded cardboard also makes good mulch. The advantage of used straw, newspapers, shredded paper and cardboard is rapid decomposition without creating nutrient stress. As they are opaque, they control weeds by the shade they create.
Black plastic and landscape fabric also make good mulch. Black plastic mulches also prevent the loss of water by evaporation. But these mulches must be removed at the end of the growing season. Landscape fabric has another drawback in that weeds such as Bermuda grass, pig weed and nut sedge can grow through the fabric making it impossible to pull them without damaging the fabric. Removing the fabric at the end of the season is also harder because of weeds that have grown through the fabric.
For tomatoes, peppers or eggplants, delay mulching until the first cluster of fruit is forming.
Prune a Pine Hedge
For a dense pine-tree hedge, follow the training method used by nurserymen and Christmas-tree growers to shape evergreens to grow densely. Mid-June is the time.
You must prune within five weeks after the needles appear fully mature, showing their normal dark-green color. Timing is critical because pine trees normally produce only one flush of growth each year. If pruning is too late, there will not be sufficient time for new buds to form.
Depending on the species, pine trees produce their needles in clusters of two, three or five, called fascicles. If left unpruned, they produce a center bud and five to eight side buds at the end of the new growth. By pruning at this time, you force the pine trees to initiate buds in the remaining clusters of needles, forcing more of the needle clusters to form buds.
As soon as the needles on this year’s new growth have achieved normal length, prune back the new growth. If the trees are young, you may want to cut only the new growth in half. If the hedge of trees is approaching the desired size, you may wish to prune back two-thirds to three-fourths of the new growth.
Take care to allow five or six sets of needles to remain on each new stem. Vegetative buds will form in the center of nearly each cluster of needles.
Fir trees and spruce trees can be pruned almost any time of year, but for pine trees, timing is critical.
